To be honest, I have never believed that I will write about developing Mac applications with C#. Well, I am more or less hardcore C# & .NET developer so this post is (I guess) a bit out-of-my-course.
Not so long ago, .NET developers were limited to develop applications strictly for Windows environment.
But with .NET Core, Xamarin and related technologies, this changed. We all know that console-based, web-based .NET Core and Xamarin’s mobile-based applications enable cross platform development. But what about desktops? .NET Core 3.0 was extended with Windows Presentation Foundation (WPF) and Widows Forms. These two .NET desktop development stacks are available only for Windows. What about Linux and macOS desktops?
In this blog, I will focus on macOS desktop development with C#. I will show what is possible and how to start with macOS desktop development with C#.
For me, writing C# application targeting macOS sounds like science fiction. But with Xamarin.Mac this is possible. Xamarin.Mac enables .NET developers to develop full native Mac applications with C#. Under the hood, accessing native macOS APIs is the same as with Objective-C or Swift development.
I will start with empty macOS Cocoa/C# application. Then I will put some GUI elements and wire-up control properties and events with a C# logic. At the end, I will show how to extend this basic approach to a more complex scenario.
Empty Mac application
For start, I will create empty Cocoa app with C#. I would like to show how easy this is with Visual Studio for Mac 2019 (version 8.4).
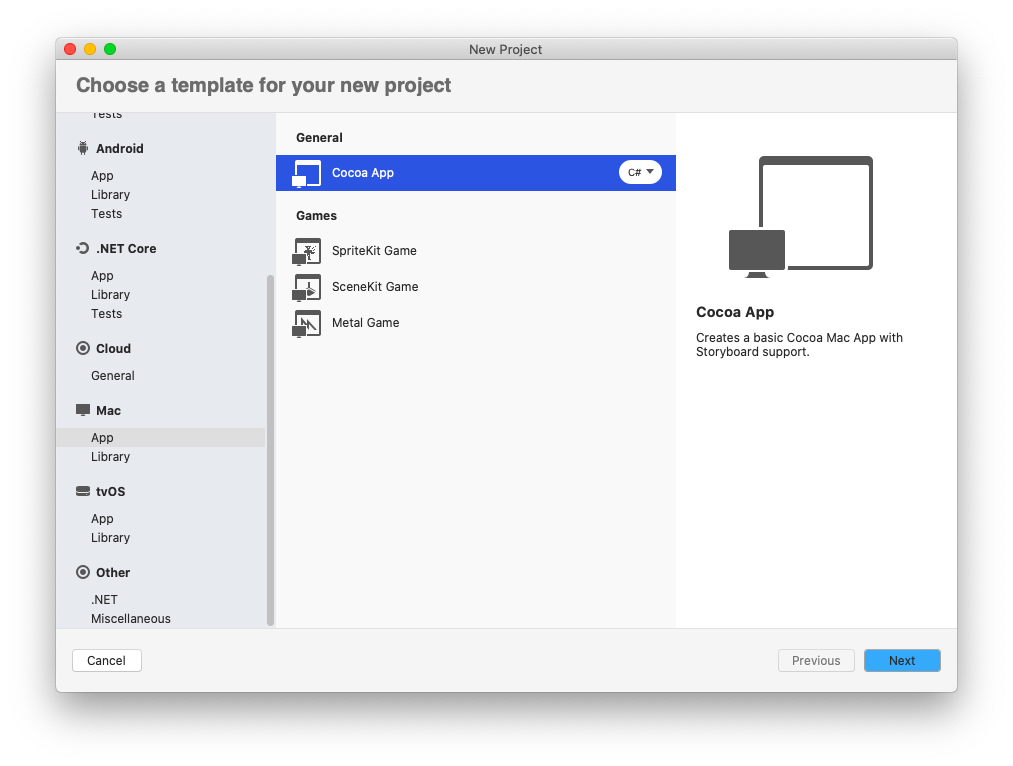
I open my Visual Studio for Mac 2019 and start new Mac/Cocoa App/C#, e.g.:
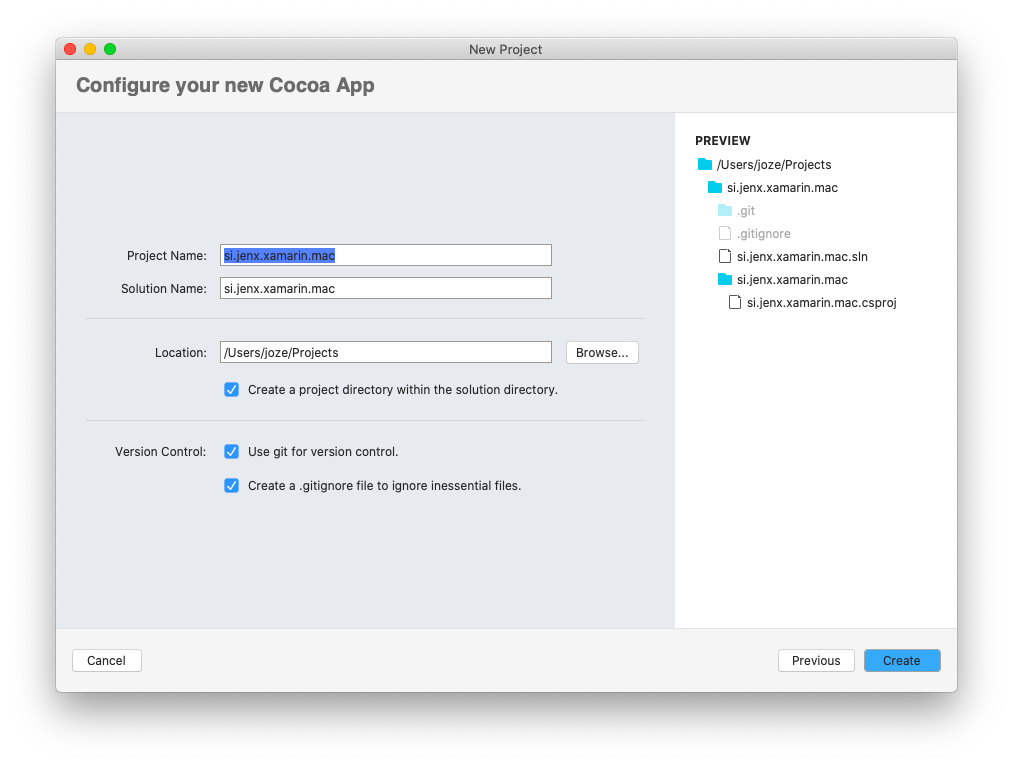
Then, I configure Visual Studio project and solution names, location and if I will use git on my project.
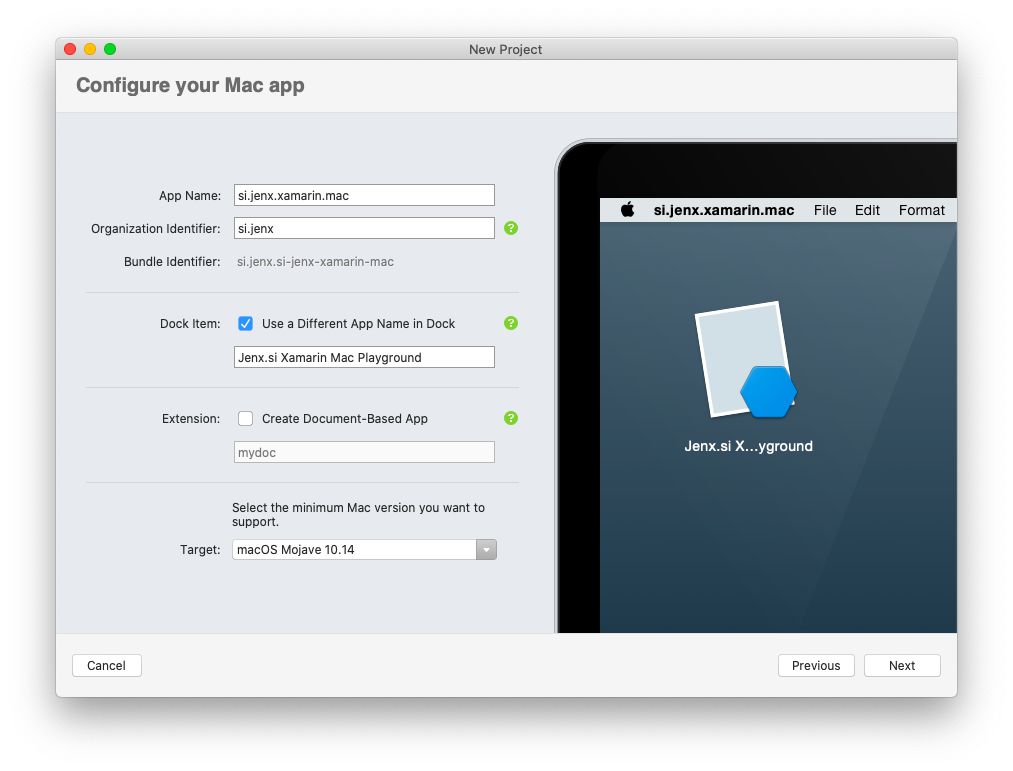
Next step is entering application-related and basic data for newly created application.
Everything is ready, I just build and run the project. My empty Mac app is started as shown below.
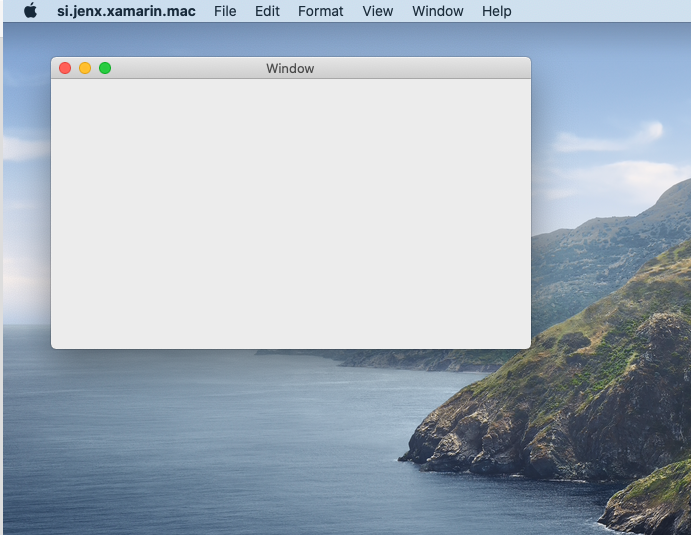
This was simple. Thanks to Visual Studio for Mac this is super simple and ultra productive! I am still amazed how quickly – with few clicks and entries – application is up and running.
But now real magic begins.
Building GUI
To start designing GUI, I right click Main.storyboard and select Open With/Xcode Interface Builder, as shown below:
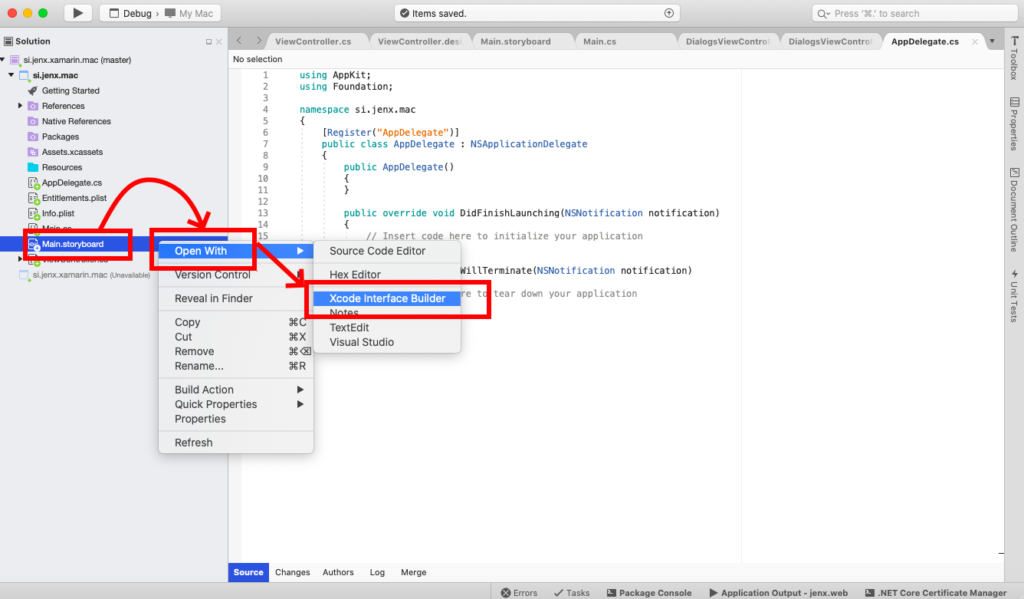
Xcode is opened with GUI designer where I can design my application’s graphical interfaces.
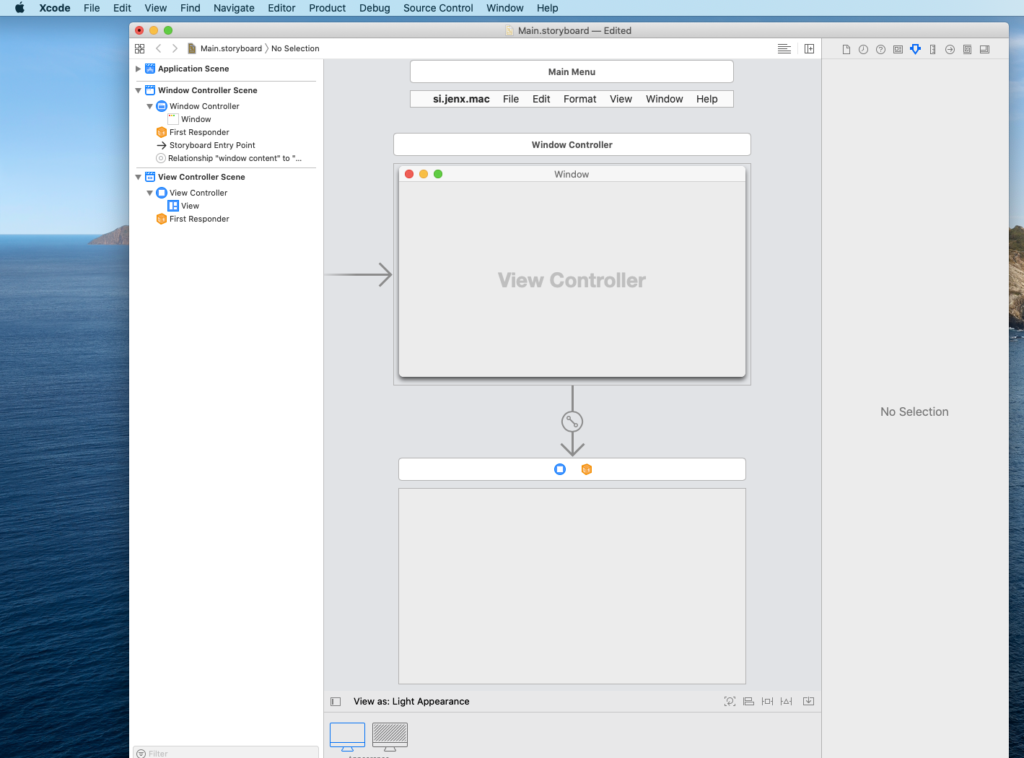
Designing GUI is very similar as with Visual Studio Windows Forms or WPF designers – I simply drag and drop controls to the correct position, set up control properties and that’s it. I do this by clicking Library button (menu: View->Show Library, shortcut: cmd+shift+L), selecting desired control and drag it to the View surface of selected ViewController. I can basically use all controls in the Apple AppKit framework. For more check out this link: https://developer.apple.com/documentation/appkit.
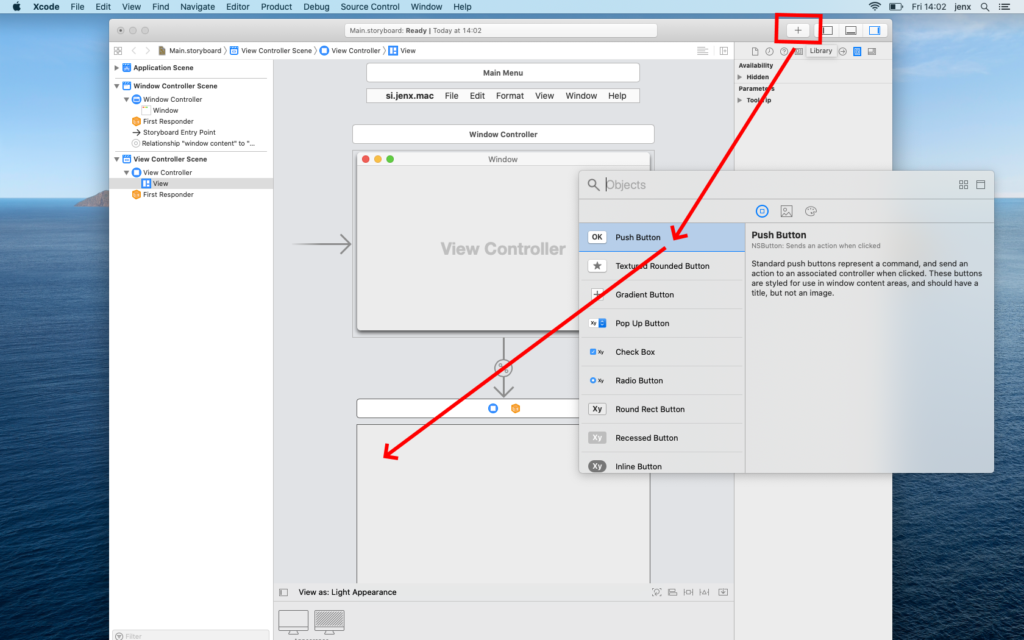
For the purpose of this experiment, I add one Button and one Label control. Long story short: I save storyboard, return to Visual Studio, compile and run. Result is something like this:
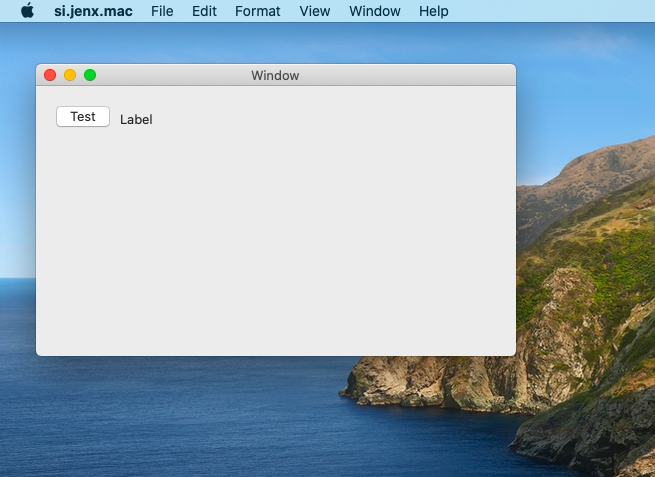
Here, I created simple and basic user interface, but you can imagine that very complex interfaces can be constructed with Apple AppKit controls. Next thing I’ll do is to put some logic into my application.
Actions and Outlets – or for .NET developers: EventHandlers and Properties
Now, it’s time to wire-up controls with C# code. First, I open my Main.storyboard in Xcode (check previous section how to to this). Then I rearrange windows as shown on bottom picture. Because, I’ll do some drag-and-drooping it’s very convenient to properly arrange windows to be visible on my desktop. Window on the right-hand-side shows Visual Studio generated ViewController header (.h) file. Middle sections depicts Main.storyboard GUI designer.
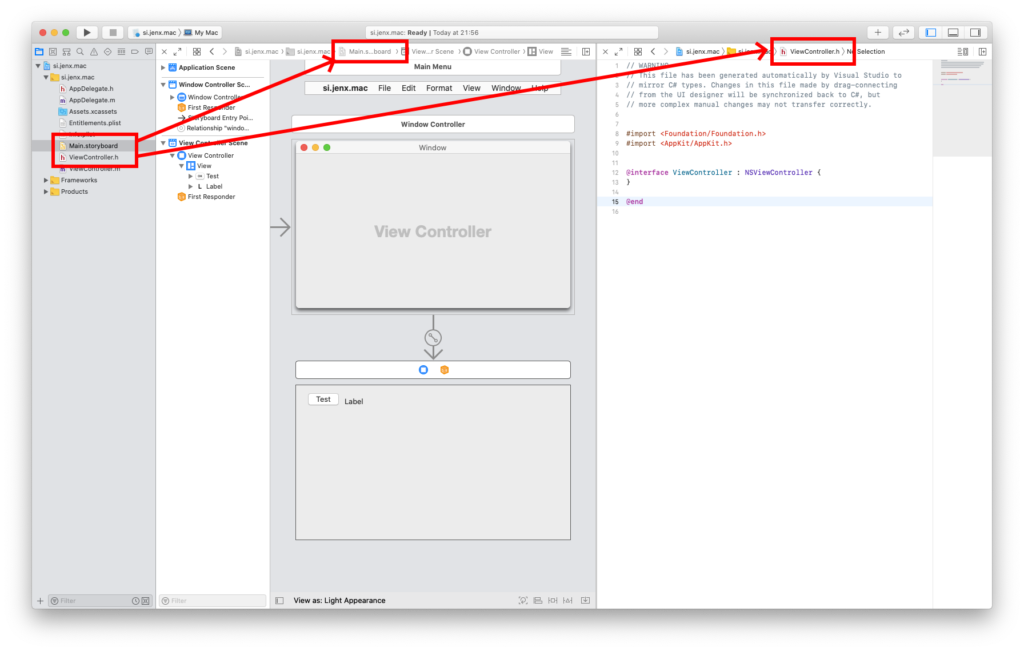
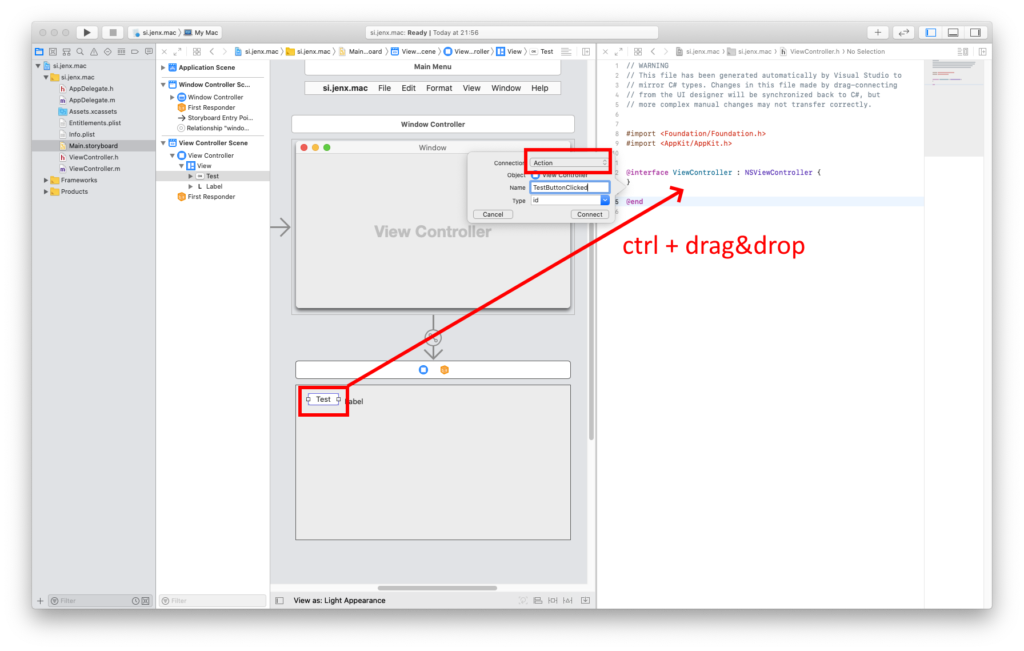
When I have everything on place I select button control, hold down ctrl button on my Mac keyboard and drag to my ViewController.h file, as marked below. When connection popup is displayed I just need to define what kind of connection I am creating: Action (eventhandler) or Outlet(property).
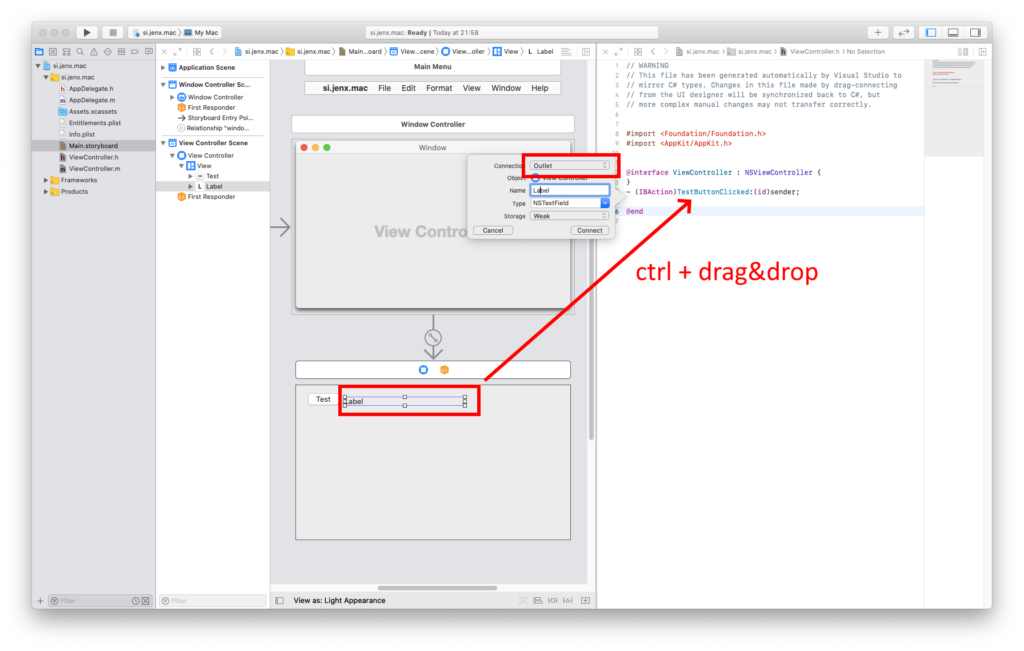
I do similar with my label, except here I select Outlet in my connection popup. Check image below for more info.
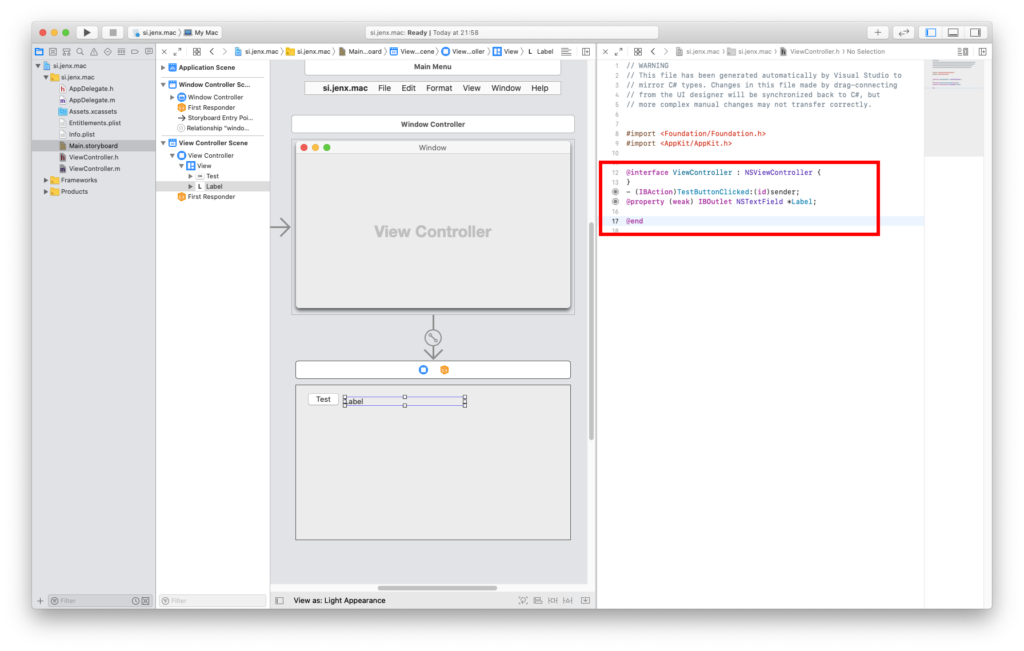
If everything is ok, I have this definition in my ViewController header file.
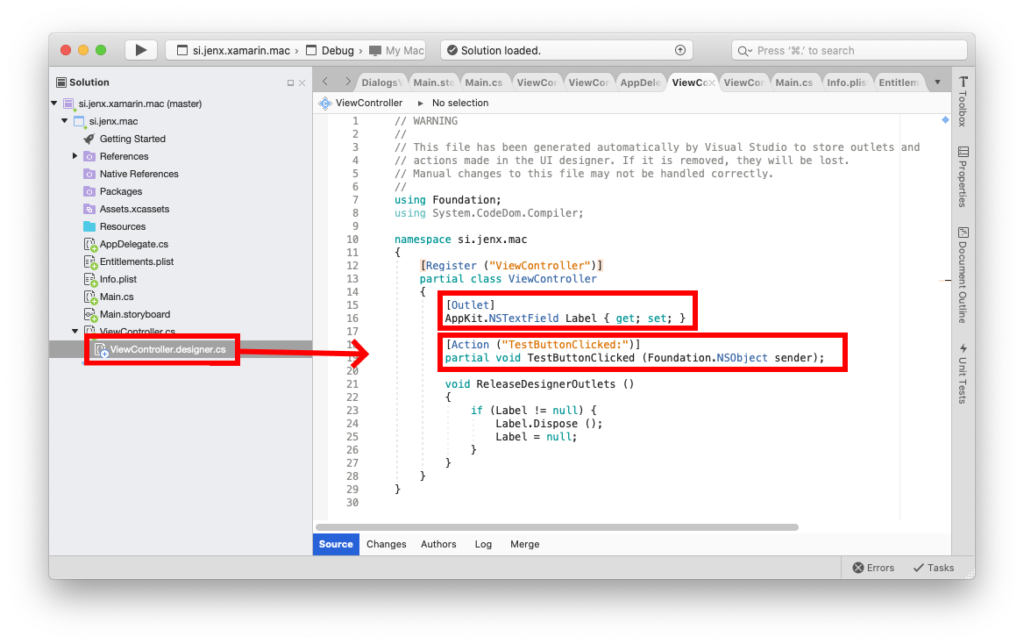
When I save everything, close Xcode and return to Visual Studio for Mac, I can see that VS for Mac generated some code. Generated code is link between C# code and GUI elements.
If I want to execute code in my button eventhandler I simply extend TestButtonClicked event handler and set property to exposed label. Check image below for more visual representation. I compile the code and run the application. Next picture shows my test application in action.
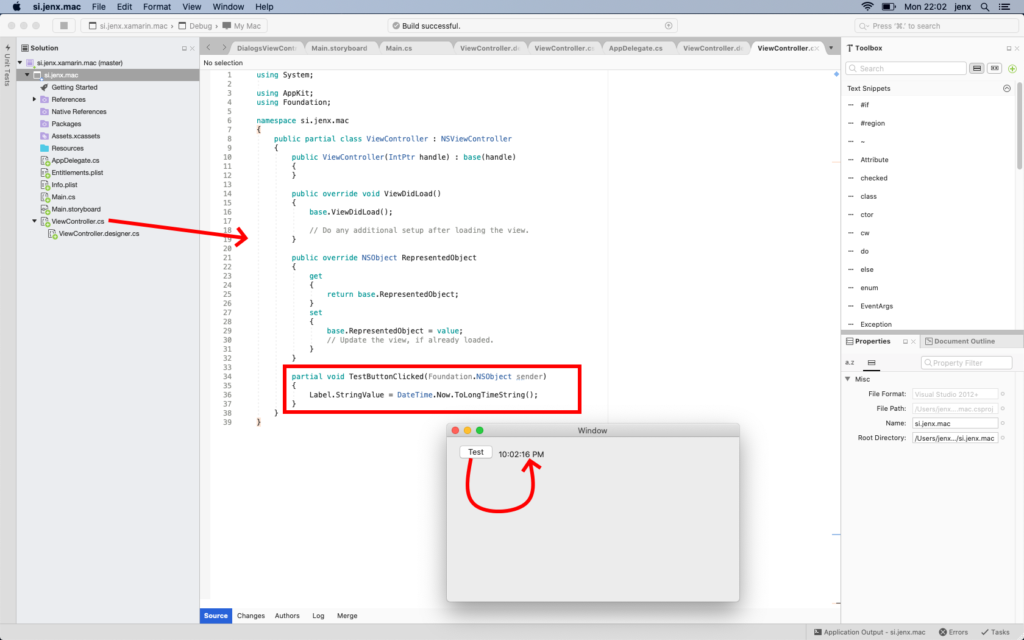
That’s it. In this section I wired-up GUI elements with C# code behind logic.
Simple macOS application – symmetric encryption and hash function in C#.
To show a little more complex situation, I implement the same application as I did for Blazor in my blog post entitled Blazor, run C# code inside web browser .
I would not go into to much details, I simply used methodology described in previous chapters. First, I fine-tuned GUI and then wire up native controls Actions and Outlets with C# code. When all this was on place, I proceed as with other normal C# applications: write C# code with some logic.
My final application:
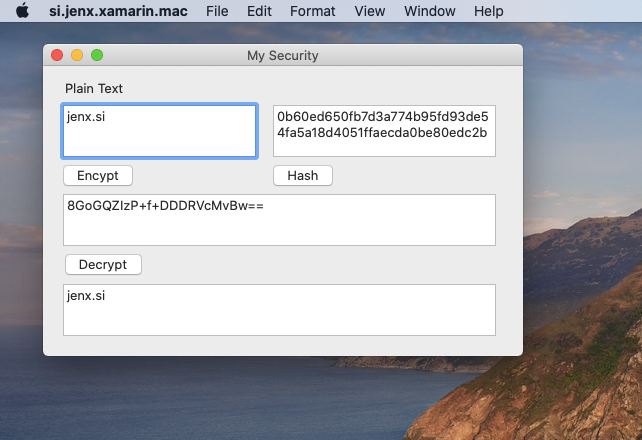
and corresponding C# code:
|
1 2 3 4 5 6 7 8 9 10 11 12 13 14 15 16 17 18 19 20 21 22 23 24 25 26 27 28 29 30 31 32 33 34 35 36 37 38 39 40 41 42 43 44 45 46 47 48 49 50 51 52 53 54 55 56 57 58 59 60 61 62 63 64 65 66 67 68 69 70 71 72 73 74 75 76 77 78 79 80 81 82 83 84 85 86 87 88 89 90 91 92 93 94 95 96 97 98 99 100 101 102 103 104 105 106 107 108 109 110 111 112 113 114 115 116 117 118 119 120 121 122 123 124 125 126 127 128 129 130 131 132 133 134 135 136 |
using System; using System.IO; using System.Security.Cryptography; using System.Text; using AppKit; using Foundation; namespace si.jenx.xamarin.mac { public partial class ViewController : NSViewController { private string _key = "xo9dm2xdb2zmh3e0clj32vyn3s8z4f6b"; private string _plainText = "jenx.si"; public ViewController(IntPtr handle) : base(handle) { } public override void ViewDidLoad() { base.ViewDidLoad(); PlainTextTextBox.StringValue = _plainText; } public override NSObject RepresentedObject { get { return base.RepresentedObject; } set { base.RepresentedObject = value; // Update the view, if already loaded. } } partial void DecryptButtonClicked(NSObject sender) { DecryptedTextTextBox.StringValue = DecryptString(CryptedTextTextBox.StringValue); } partial void HashButtonClicked(NSObject sender) { HashTextBox.StringValue = CalculateHash(PlainTextTextBox.StringValue); } partial void EncryptButtonClicked(NSObject sender) { CryptedTextTextBox.StringValue = EncryptString(PlainTextTextBox.StringValue); } private string EncryptString(string plainText) { try { byte[] iv = new byte[16]; byte[] array; using (var aes = Aes.Create()) { aes.Key = Encoding.UTF8.GetBytes(_key); aes.IV = iv; ICryptoTransform encryptor = aes.CreateEncryptor(aes.Key, aes.IV); using (var memoryStream = new MemoryStream()) { using (var cryptoStream = new CryptoStream((Stream)memoryStream, encryptor, CryptoStreamMode.Write)) { using (var streamWriter = new StreamWriter((Stream)cryptoStream)) { streamWriter.Write(plainText); } array = memoryStream.ToArray(); } } } return Convert.ToBase64String(array); } catch (Exception ex) { return ex.Message + _key.Length; } } private string DecryptString(string cryptedString) { try { byte[] iv = new byte[16]; byte[] buffer = Convert.FromBase64String(cryptedString); using (Aes aes = Aes.Create()) { aes.Key = Encoding.UTF8.GetBytes(_key); aes.IV = iv; ICryptoTransform decryptor = aes.CreateDecryptor(aes.Key, aes.IV); using (MemoryStream memoryStream = new MemoryStream(buffer)) { using (CryptoStream cryptoStream = new CryptoStream((Stream)memoryStream, decryptor, CryptoStreamMode.Read)) { using (StreamReader streamReader = new StreamReader((Stream)cryptoStream)) { return streamReader.ReadToEnd(); } } } } } catch (Exception ex) { return ex.Message + _key.Length; } } private string CalculateHash(string text) { using (var sha256Hash = SHA256.Create()) { byte[] bytes = sha256Hash.ComputeHash(Encoding.UTF8.GetBytes(text)); var builder = new StringBuilder(); for (int i = 0; i < bytes.Length; i++) { builder.Append(bytes[i].ToString("x2")); } return builder.ToString(); } } } } |
One other interesting thing here is that I could put all this C# code in some shared library (e.g. .NET Standard shared library) and shared it between Blazor (see here) or used in macOS desktop application. This is really something: executing same code inside Web browser with WebAssembly or in macOS Cocoa application. For me this is really awesome.
To summarize, I demonstrated how to create simple macOS Cocoa application with C# and Xamarin.Mac. Applications and scenarios can be a lot more complex, but the basic approach how to develop macOS apps with C# is as shown in this blog post.
Conclusion
Xamarin.Mac exposes the complete macOS SDK for .NET developers to build native Mac applications using C#. This basically means that I have all APIs available to my C# code, similar as Swift or Objective-C developers. I can reuse my C# knowledge to build native macOS desktop applications.
Currently, the best way to develop Mac applications with C# is (still) by switching between Visual Studio for Mac and Xcode. Inside Visual Studio I normally write C# code, i.e. logic, while Xcode I use for editing storyboards – or GUI designs.
At first, development was a bit awkward, but later on, when I got used to switching between Xcode and Visual Studio – it become automatism – just a routine. After a while, Visual Studio for Mac, Xcode and a little bit of practice produced satisfying development experience.
I know that C# with Xamarin.Mac is not mainstream macOS desktop development, but for me – .NET Developer – this is very interesting technology. Now, I can reuse C# knowledge and create macOS desktop apps similar as Swift or Objective-C developers. Technically speaking, I am accessing and using the same underlying APIs. Nice.
Happy coding!


2 thoughts on “How to start developing macOS desktop applications with C#”
Thank you for this tutorial. All Xamarin.Mac documentation is scarce and all code samples that I have found so far use the example of a Button for an Action, which seems to match the Clicked event. How do you create handlers for other events? For example, a MouseDown event for an ImageView control?
Thank you very much! that was very useful getting started! the challenging part was holding control and dragging button in the body of class between { and }. it will not work if you drop outside the body of class